
PicSift Guide
How to delete large videos and screenshots on iPhone
Find and safely delete large videos, screen recordings, and screenshots on iPhone while protecting important originals and checking Recently Deleted.
To clean up large videos and screenshots safely, first check Settings → General → iPhone Storage, then review the relevant media types in Photos. Export anything irreplaceable, delete only verified items, and inspect Recently Deleted before permanently removing content.
Screenshots are usually faster to review; long videos and screen recordings often offer the larger storage opportunity. PicSift can help you make deliberate keep/remove decisions, but Apple Photos and iOS remain responsible for the library, storage reporting, and recovery.
1. Measure the problem before deleting
Open Settings → General → iPhone Storage and wait for iOS to calculate usage. Apple shows device storage by app and may display recommendations. Its current instructions are in How to check the storage on your iPhone and iPad.
Record the Photos total before cleanup. This gives you a useful baseline, but do not expect it to update instantly after every deletion. Photos processing, iCloud synchronization, and the Recently Deleted collection can delay what you see.
Storage size alone cannot tell you which media is safe to remove. Use it to prioritize the review, not to automate the decision.
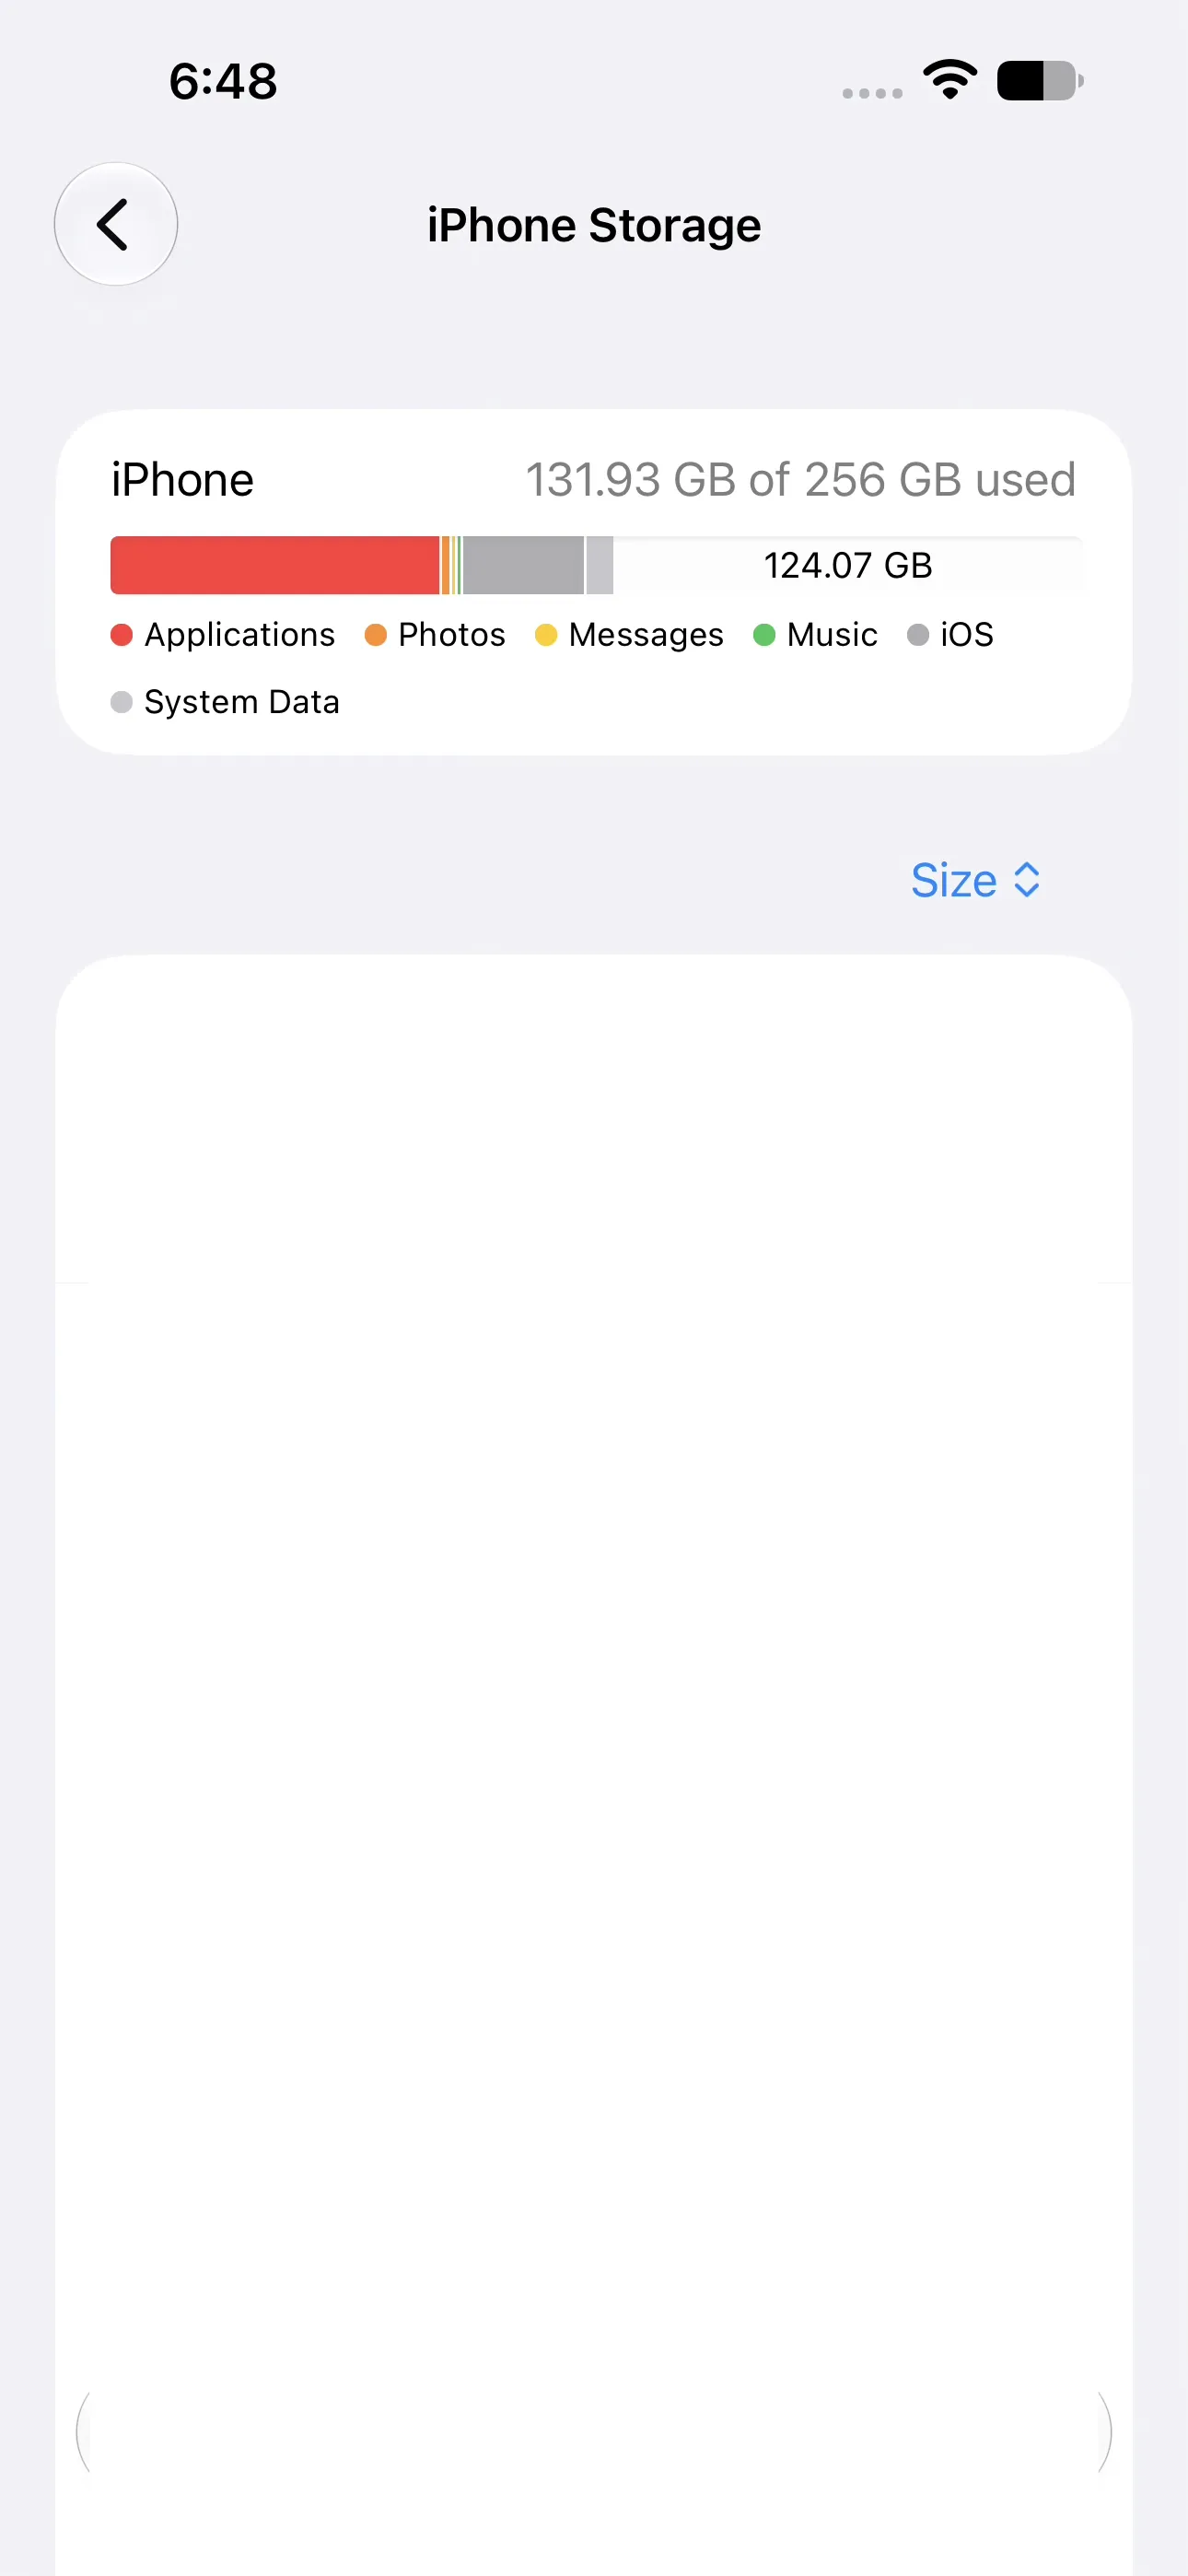
Use iPhone Storage as a baseline, not as a deletion recommendation. Captured on iOS 27 with PicSift 1.3.
2. Open screenshots, videos, and screen recordings by media type
In the current Photos app, open Collections, scroll to Media Types, and choose a relevant group such as Screenshots, Videos, or Screen Recordings. Apple’s Photos browsing guide describes locating items by media type.
Apple saves iPhone screenshots in Photos, where the Screenshots media type provides a focused review scope. Screen recordings are also saved to Photos. See Apple’s guides to take a screenshot on iPhone and record the screen on your iPhone.
Menu placement can differ between iOS releases. If a label is not visible, search within Photos or consult Apple’s guide for your installed version.
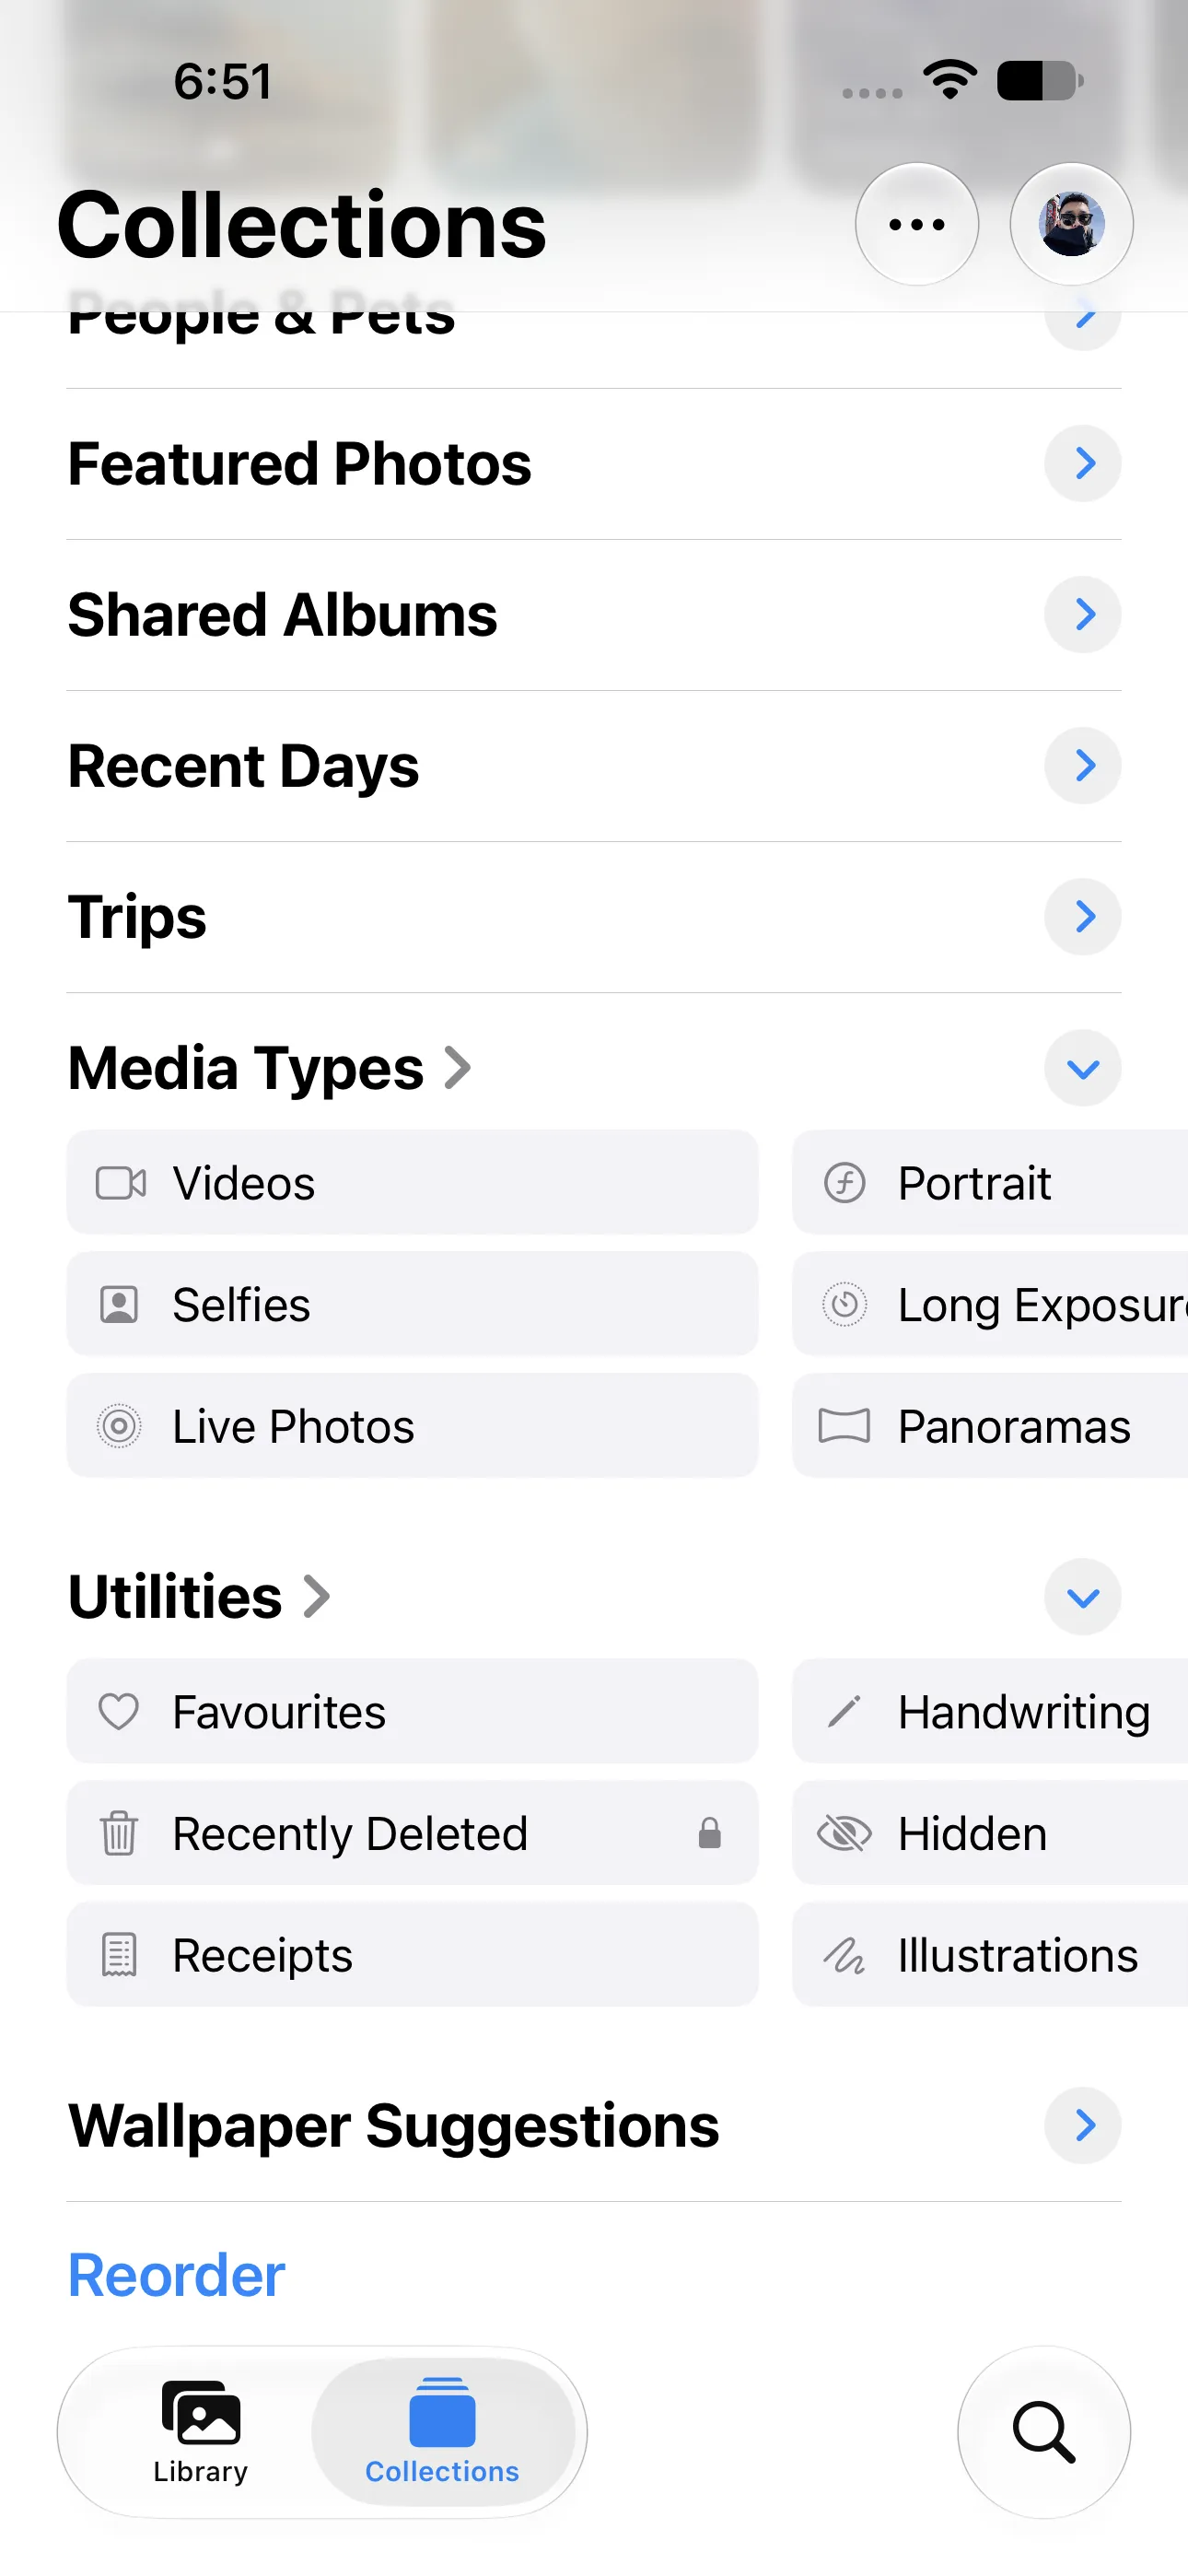
Videos appear under Media Types in this Apple Photos layout; screenshots and screen recordings may appear elsewhere in the horizontally scrollable group. Captured on iOS 27 with PicSift 1.3.
3. Review screenshots by purpose
Screenshots often have a short useful life, but some are records rather than clutter. Sort them mentally into four groups:
| Screenshot type | Safer action |
|---|---|
| Task completed | Remove after confirming the task really is complete |
| Information available elsewhere | Verify the source still exists, then remove |
| Receipt, ticket, confirmation, or evidence | Keep or export according to its retention need |
| Personal memory or design reference | Keep if it still has deliberate value |
Good first-pass candidates include expired QR codes, accidental lock-screen captures, duplicate directions, old shopping comparisons, and temporary error messages after the issue is resolved.
Be cautious with receipts, travel documents, medical information, legal evidence, recovery codes, and screenshots that are the only record of a conversation. Their visual similarity does not make their value identical.
4. Review videos by duration and content, not size alone
Long videos, 4K clips, slow-motion footage, and screen recordings can be large. Before removing one:
- play the beginning, middle, and end;
- check whether an important moment appears inside a mostly unusable clip;
- compare similar takes for audio, focus, and people present;
- confirm whether an edited version depends on the original;
- export an irreplaceable original to a separate verified location if needed.
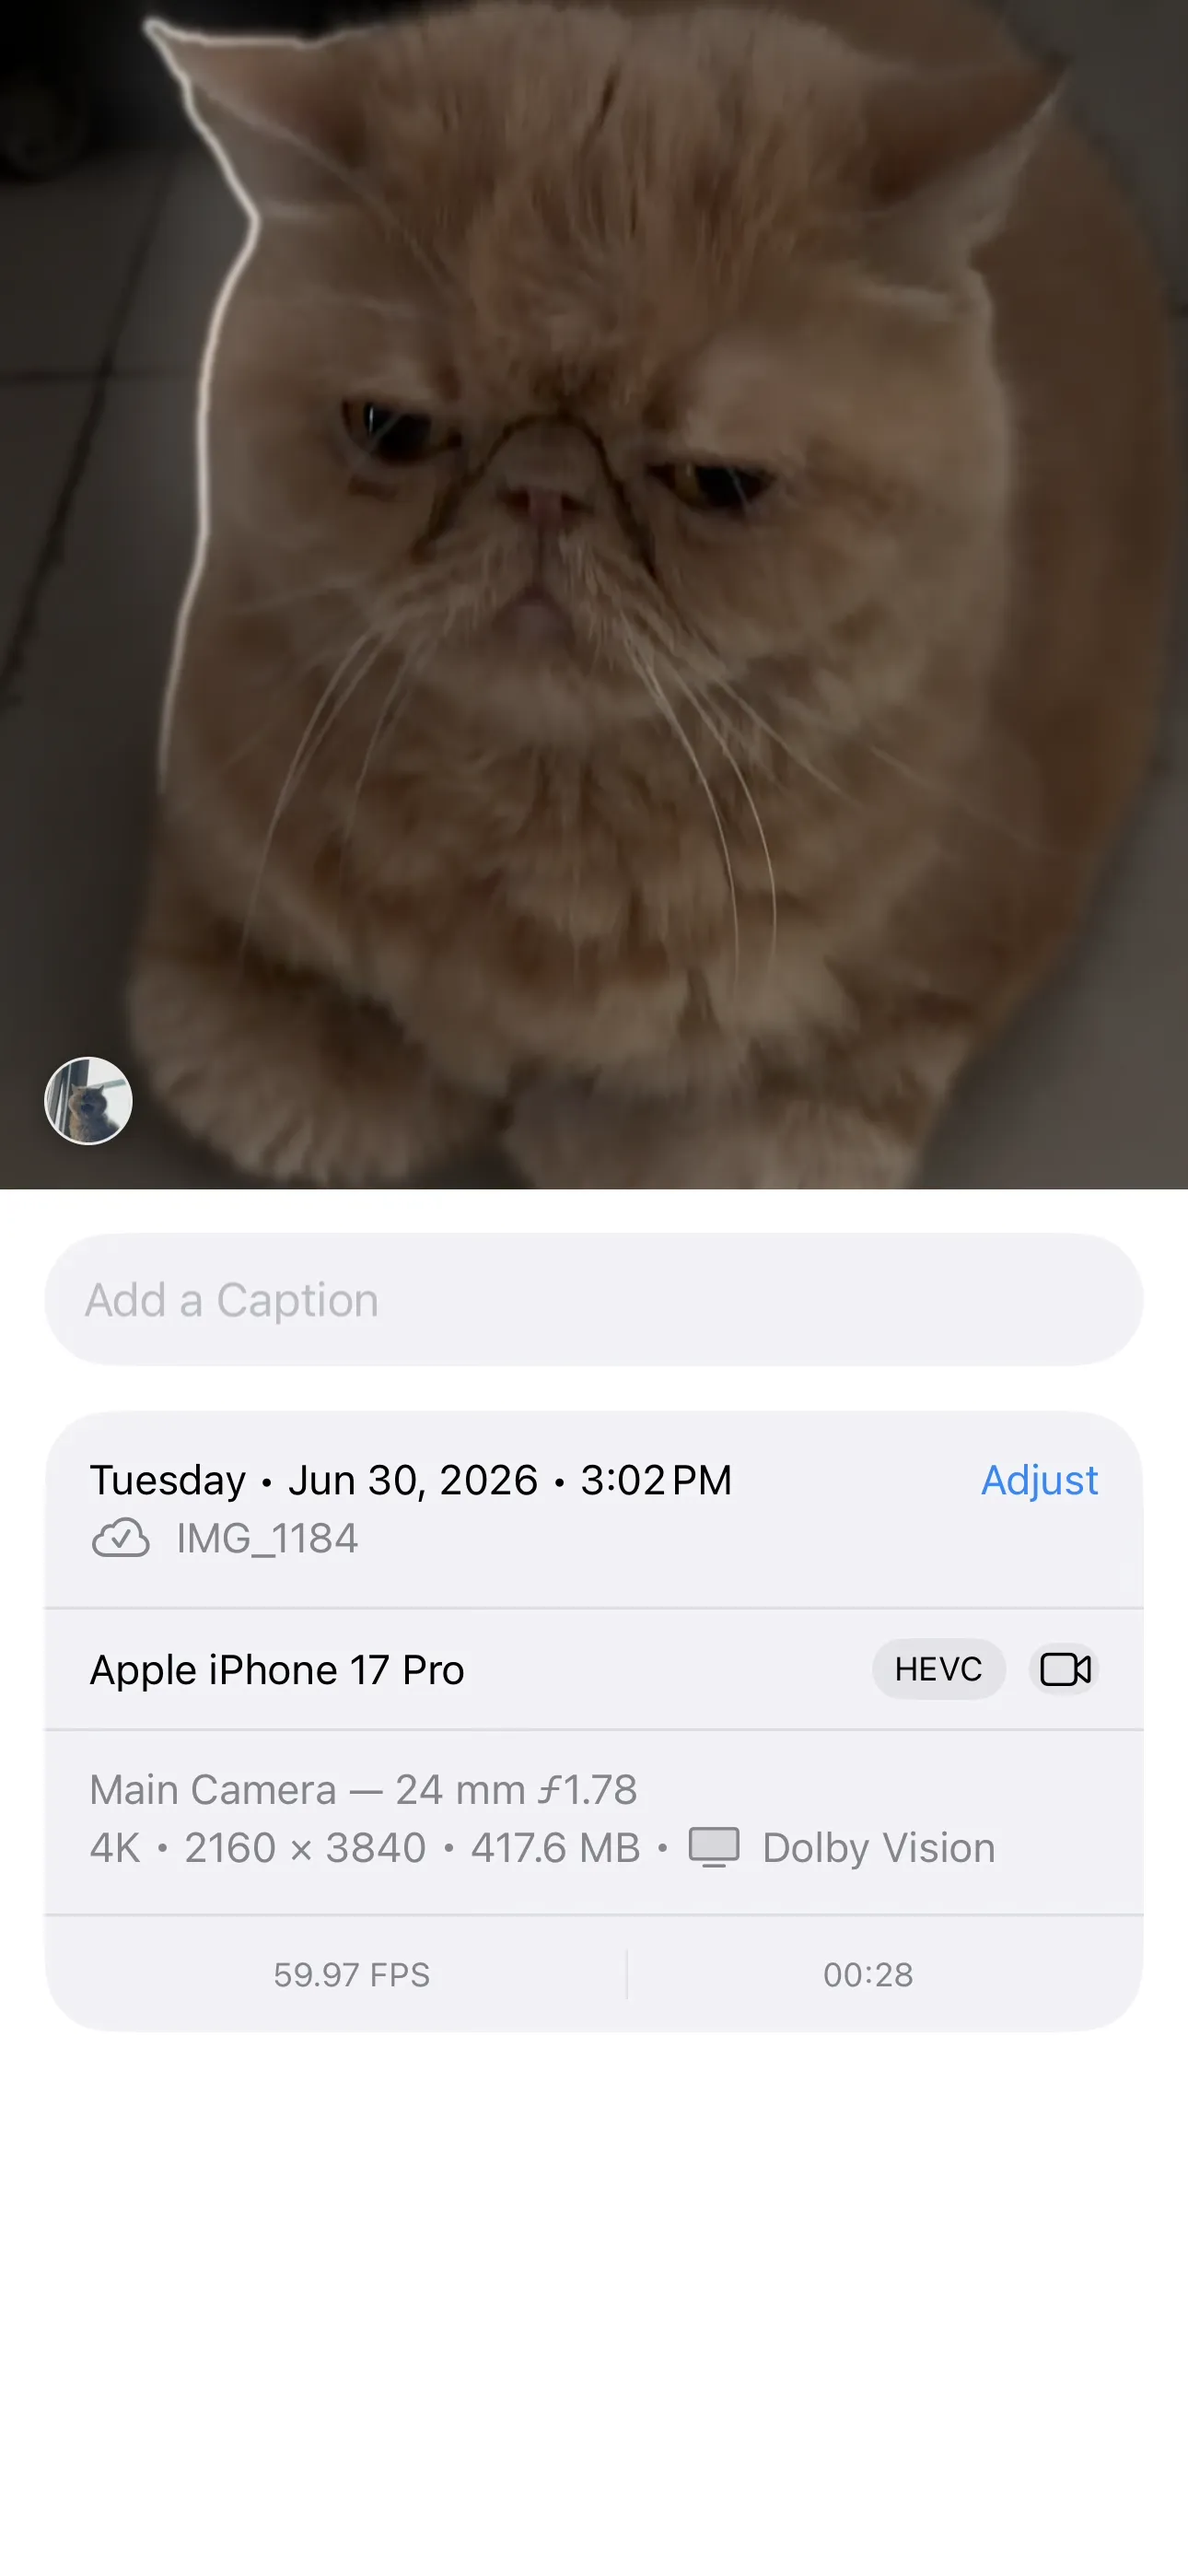
This 28-second 4K HEVC example occupies 417.6 MB, illustrating why duration alone is not enough to estimate size. Captured on iOS 27 with PicSift 1.3.
A long clip may be worth keeping even when only a short section matters. Trim or export intentionally rather than deleting based only on duration.
For screen recordings, confirm that the bug demonstration, tutorial, or proof is no longer needed. They are easy to forget because their thumbnails can look like ordinary app screens.
5. Use small review batches in PicSift
PicSift separates review choices from deletion. During a session you can mark media as kept or for removal, leave uncertain items unreviewed, and inspect the removal group before the final cleanup action.
Use one media type or recognizable period at a time. For example:
- review last month’s screenshots;
- pause and inspect the proposed removals;
- confirm the cleanup;
- then begin a separate session for screen recordings or videos.
This makes mistakes easier to spot than mixing every content type into one large purge. Follow How to review photos before deleting them for the full decision process.
PicSift’s review processing stays on your iPhone and your media is not uploaded to PicSift-operated servers. Read On-device photo processing explained and the Privacy Policy for the product boundary.
6. Confirm deletion and understand iCloud Photos
When you confirm cleanup, PicSift requests deletion through Apple Photos. If iCloud Photos is enabled, Apple states that deleting a photo or video on one device deletes it everywhere the same iCloud Photos library is used. Review Set up and use iCloud Photos before a large cleanup.
If another person participates in an iCloud Shared Photo Library, verify library ownership and context before deletion. A shared item can matter to someone else even when it looks unnecessary to you.
7. Check Recently Deleted before permanent removal
Apple normally places deleted photos and videos in Recently Deleted for 30 days. Open Photos, go to Collections, then Recently Deleted under Utilities and unlock it. Recover any mistaken selection before doing anything permanent.
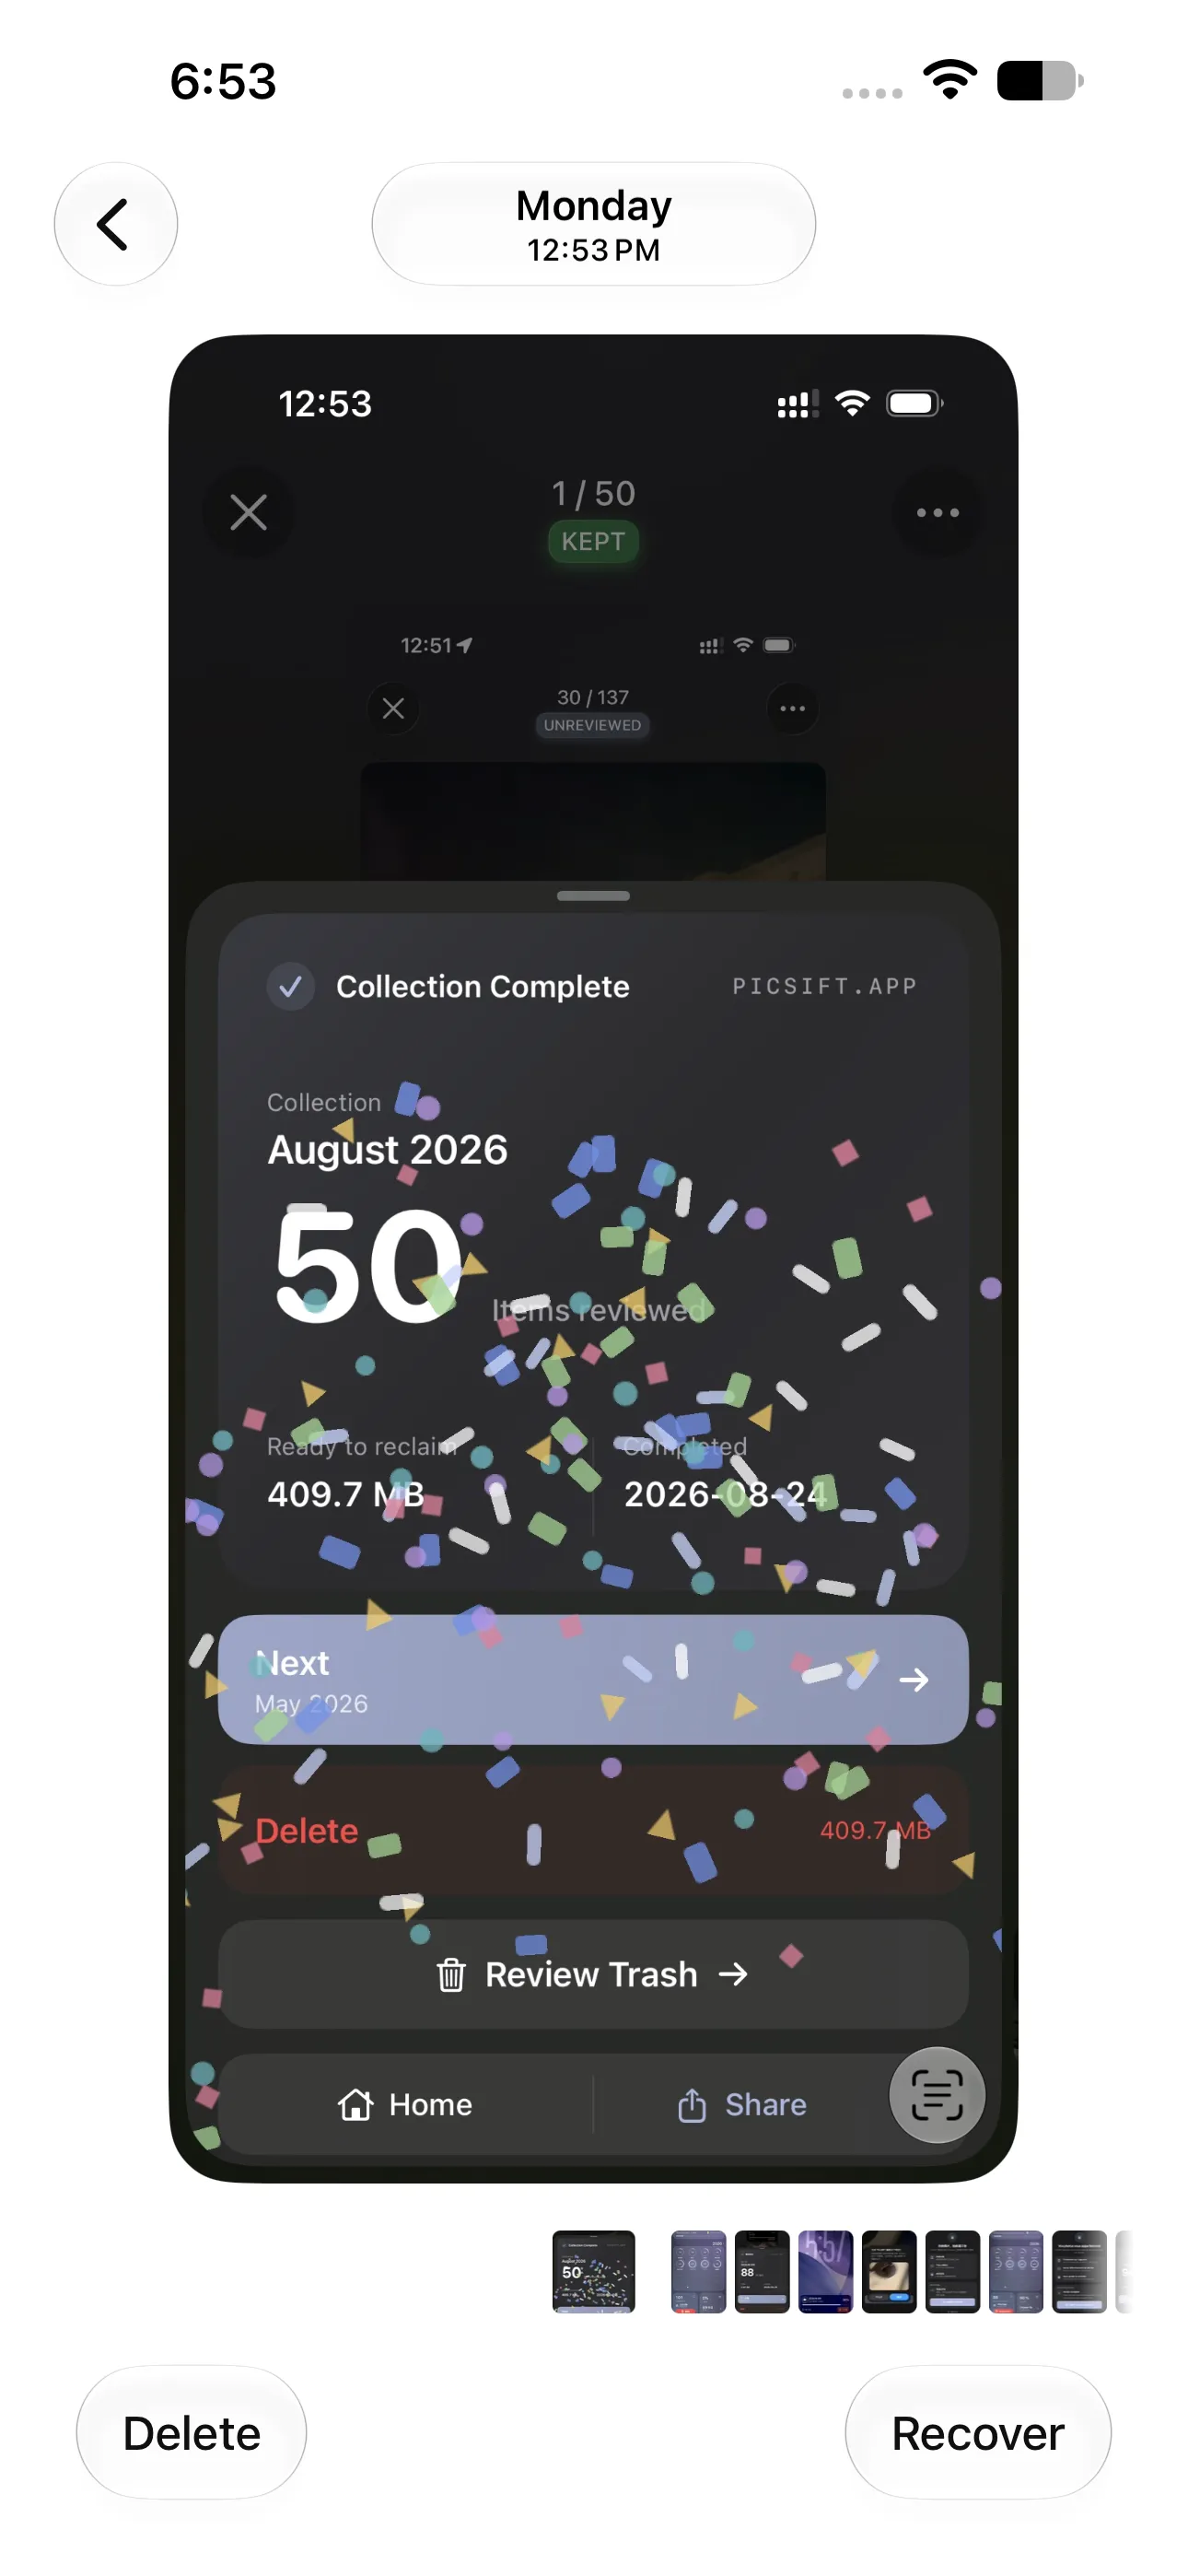
Review the actual item before choosing Delete or Recover. Captured on iOS 27 with PicSift 1.3.
Apple’s deletion and recovery guide warns that a permanently deleted item cannot be recovered through Photos. PicSift does not keep a server backup of your library.
Do not permanently empty Recently Deleted merely because the storage number has not refreshed. First verify the selection and any separate copies.
8. Measure the result
After cleanup:
- confirm the main Photos library looks correct;
- inspect Recently Deleted for mistakes;
- allow iCloud Photos time to synchronize;
- return to Settings → General → iPhone Storage;
- compare the Photos total with your baseline.
The difference may not exactly equal the apparent size of the selected files because iOS manages caches, optimized originals, and storage calculations. Use the number as a trend, not as proof that every intended item was deleted.
For a broader safety checklist, see How to clean up iPhone photos safely.
Frequently asked questions
Where are screenshots stored on iPhone?
Screenshots are saved in Apple Photos. You can usually find them under Collections → Media Types → Screenshots.
Where are iPhone screen recordings stored?
Apple saves completed screen recordings in Photos. Look under Media Types or search the library if the collection is not visible.
Does deleting from an album free storage?
Deleting a regular album does not delete its contents from the Photos library. To reduce the active library, delete the actual photo or video after reviewing it.
Why did my storage total not change immediately?
iOS may need time to process Photos changes, synchronize iCloud Photos, and recalculate storage. Deleted items also remain recoverable in Recently Deleted until Apple removes them or you permanently delete them.
Does PicSift automatically delete the largest files?
No. PicSift is a deliberate review workflow. You decide what to keep or remove, can leave uncertain items unreviewed, and then inspect the removal group before confirmation.
What if a cleanup result looks wrong?
Open Recently Deleted and recover the item first. If the issue involves PicSift’s review or confirmation flow, contact PicSift Support.